


Wall Repair Cream
Wall Repair Cream
Regular price
$12.99
Regular price
$12.99
Sale price
$29.99
Unit price
per
Couldn't load pickup availability
-
Ordered
- - -
Order Ready
- - -
Delivered

Wall Repair Cream
Regular price
$12.99
Regular price
$12.99
Sale price
$29.99
Unit price
per
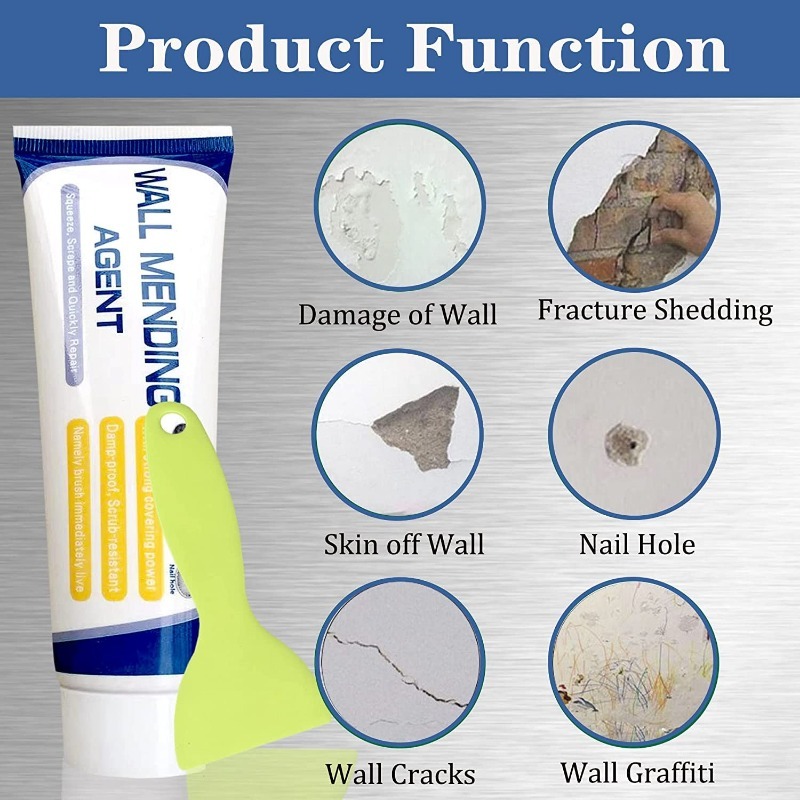
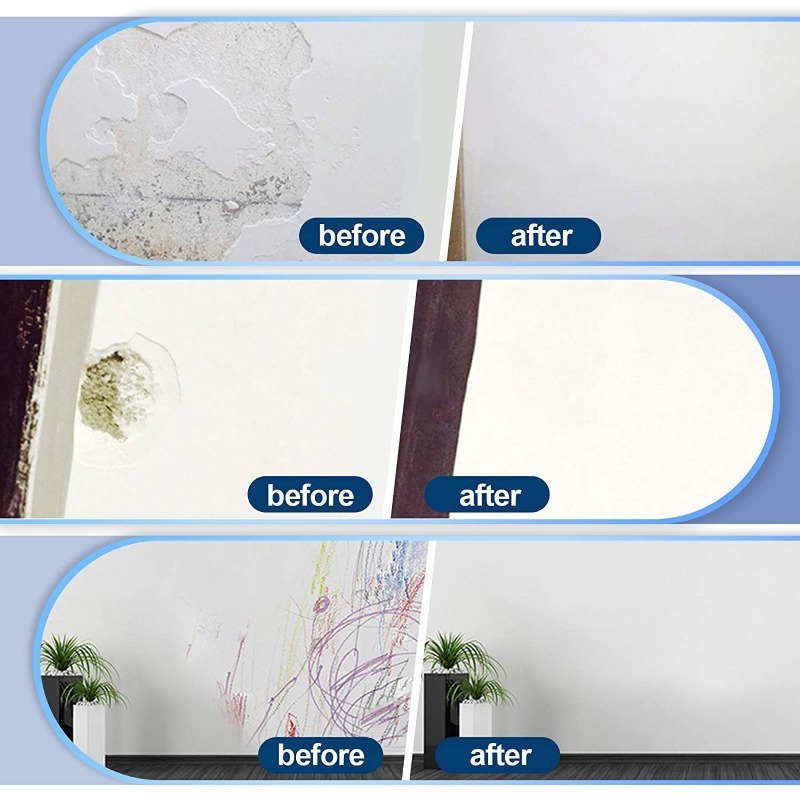
MAKE YOUR WALLS LOOK BRAND NEW IN SECONDS
UNMATCHED VERSATILITY FOR ANY KIND OF DAMAGE
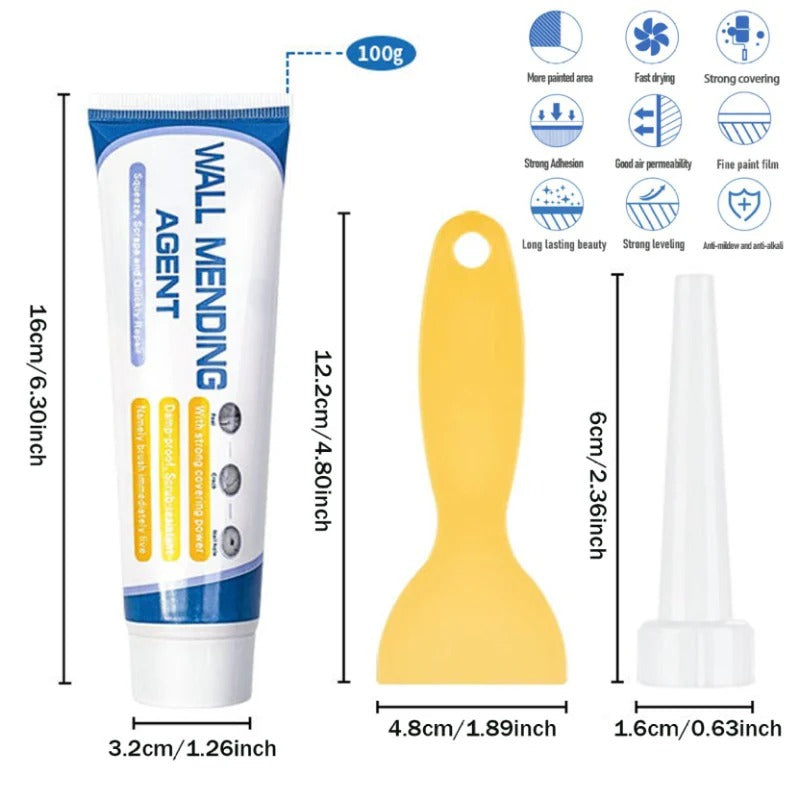
DURABLE AND LONG-LASTING MONEY-SAVER
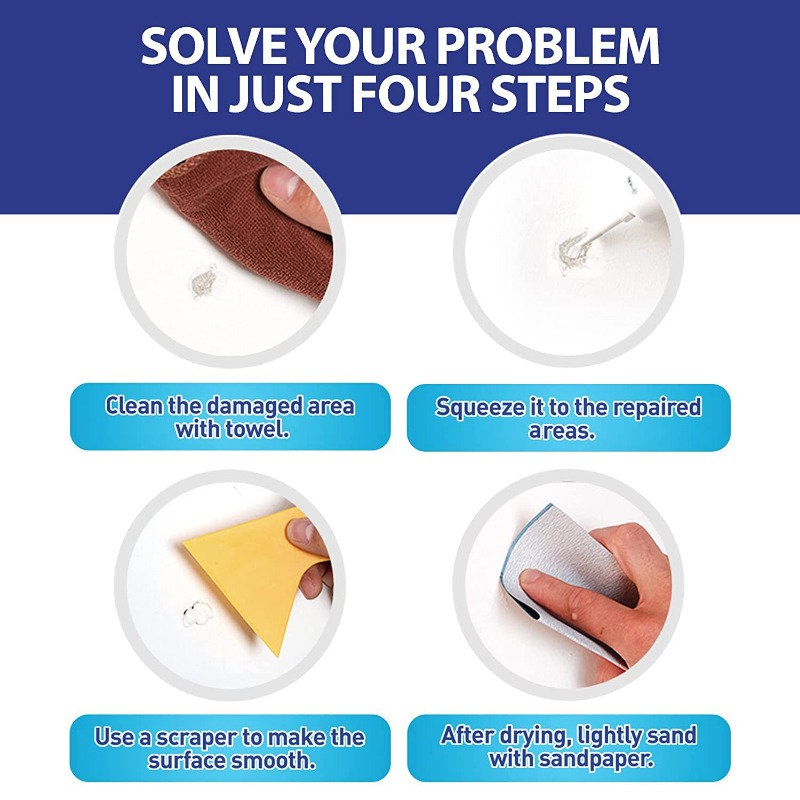
EASY TO USE
Collapsible row
Collapsible row


Custom columns
Use the flexible grid system to create any layout. Each block can be placed in any of the columns.
Image/Video Slider
Content heading
Pair icons with content to focus on your chosen product, collection, or blog post. Add details on availability, style, or even provide a review.